Once the RTC has been set, the data transmission & storage has been set up, the datalogger is ready for deployment code.
This tutorial will walk you through creating and organizing deployment code, but sensors should be calibrated after this step (see 4. Calibrating). Once sensors are calibrated, the deployment code project that you create in this tutorial can be re-uploaded to the datalogger.
This workflow of deployment code -> calibration -> deployment code aims to promote code organization, but everything will work fine if you just do calibration -> deployment code and then deploy.
PlatformIO creates project folders that are too big to host of GitHub, so we get around that by only storing our source code (a .ino fill that will go in src folder of PlatformIO project folder) and the initiation file (.ini file whose contents will be copy & pasted into the platformio.ini file in the project folder). On the project GitHub, each logger will have a specific .ino file and all loggers will use the same .ini file.
Insert SD card
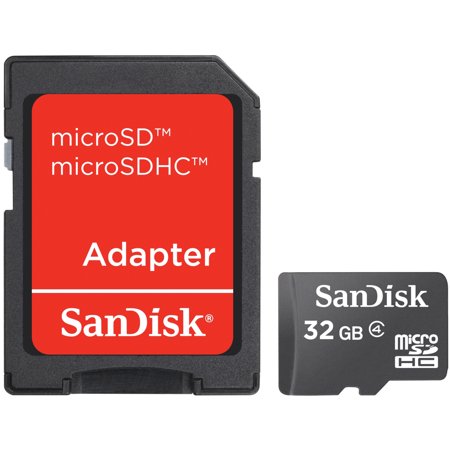
Obtain a MicroSD card. The picture below shows the microSD card adapter on the left (not needed) and the microSD card on the right.
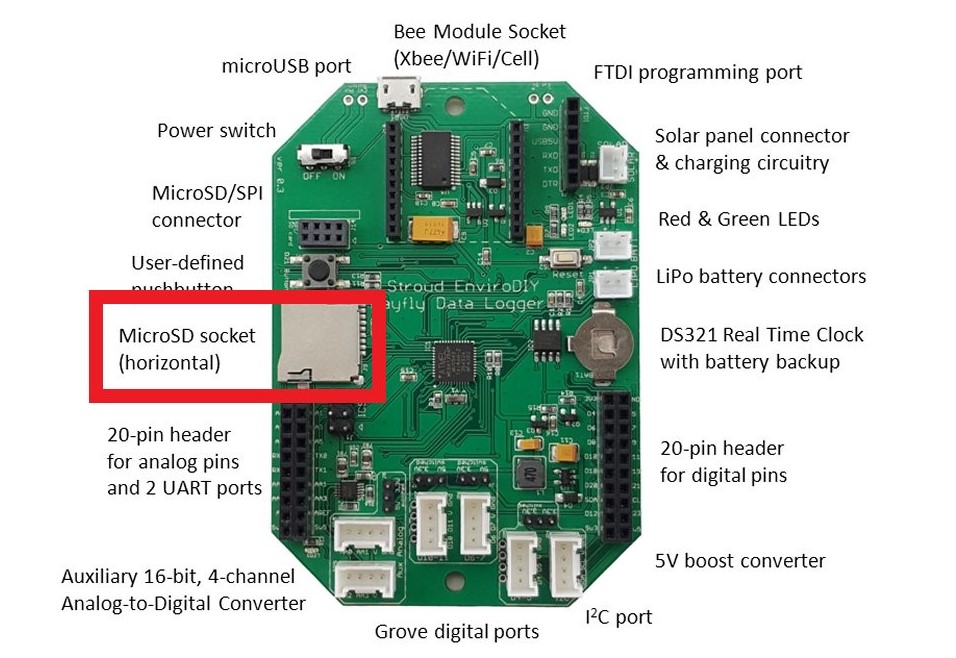
Insert the MicroSD card into the slot on the Mayfly (shown below). The gold contacts of the MicroSD card should be facing down towards the Mayfly. The card will click in. To remove the MicroSD card, you can push the card in further (you will hear another click), and the card will be released
Organize the project code
This tutorial uses the example logger name logger-00001, but this name does not exist in the GitHub. Whenever logger-00001 is mentioned, this is a placeholder for a real logger name. The original logger created in the IMS GitHub is logger-180336
Create a new PlatformIO project by clicking the
+ New Projectbutton on the right side of the PlatformIO home screen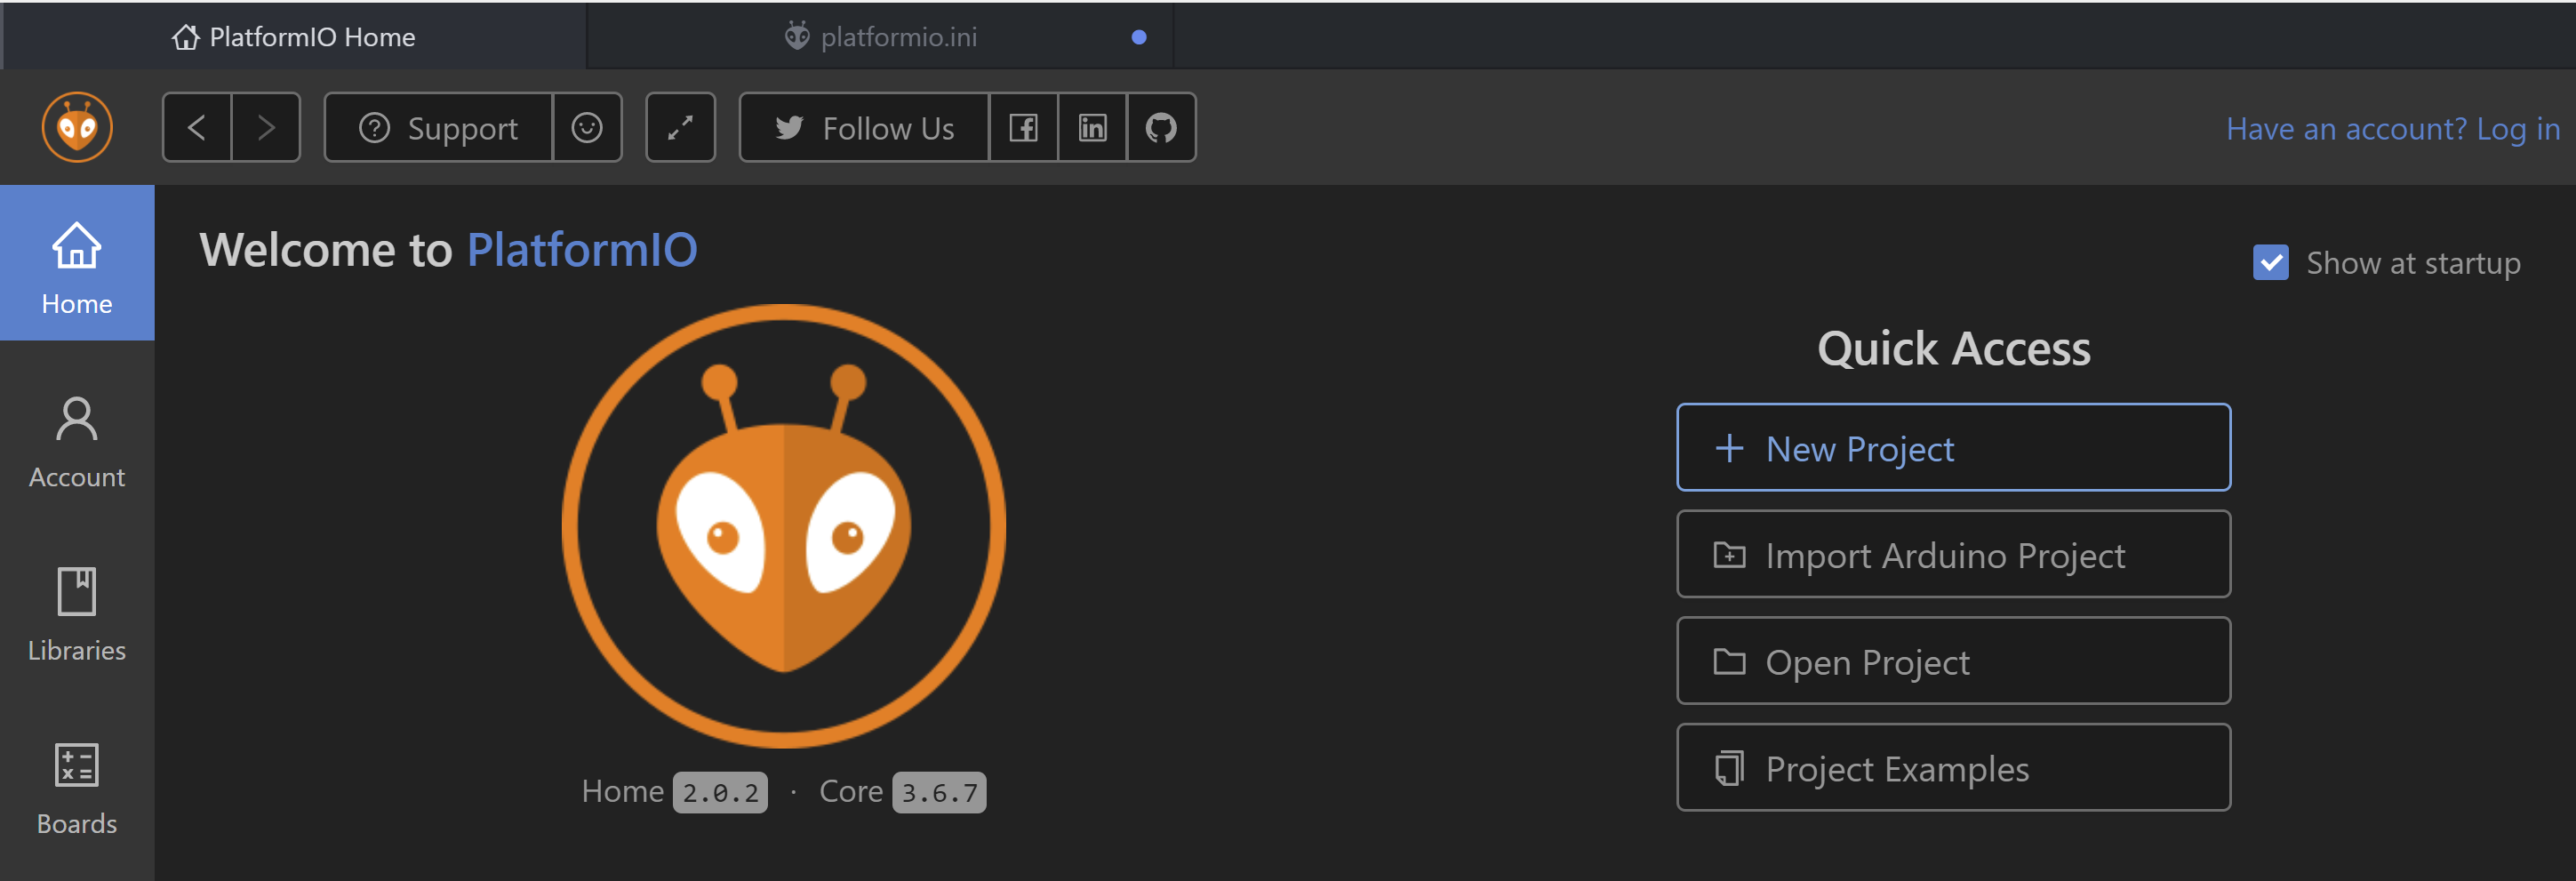
Make the name of the project the name of the location you plan to deploy the sensor station to. Past protocol was to make the project name the name of the logger (the logger serial number). Select the
EnviroDIY Mayflyas the board. Leave everything else as the default and clickFinish.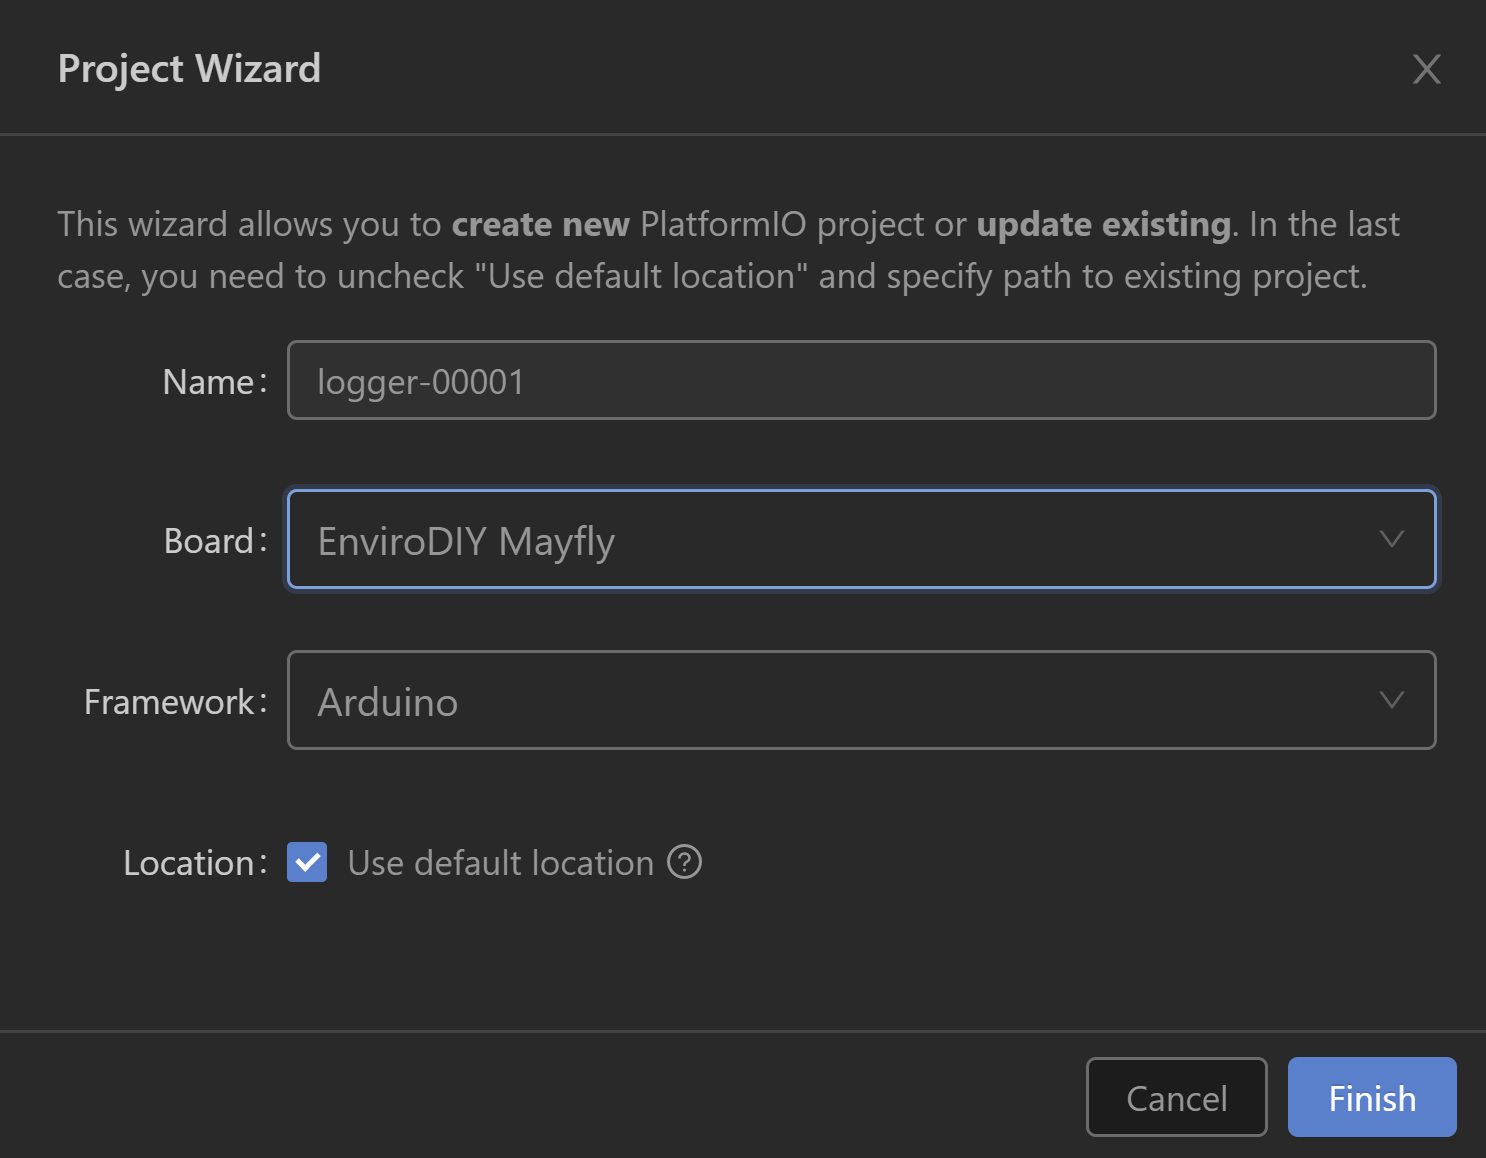
Once the project has been created, look at the left side of the screen, right click on the
srcfolder, and clickNew File. It will ask for the path of the new file, and type infilename.ino, so that the full path issrc/filename.ino. ClickEnteron the keyboard. This will create a new empy file namedfilename.ino.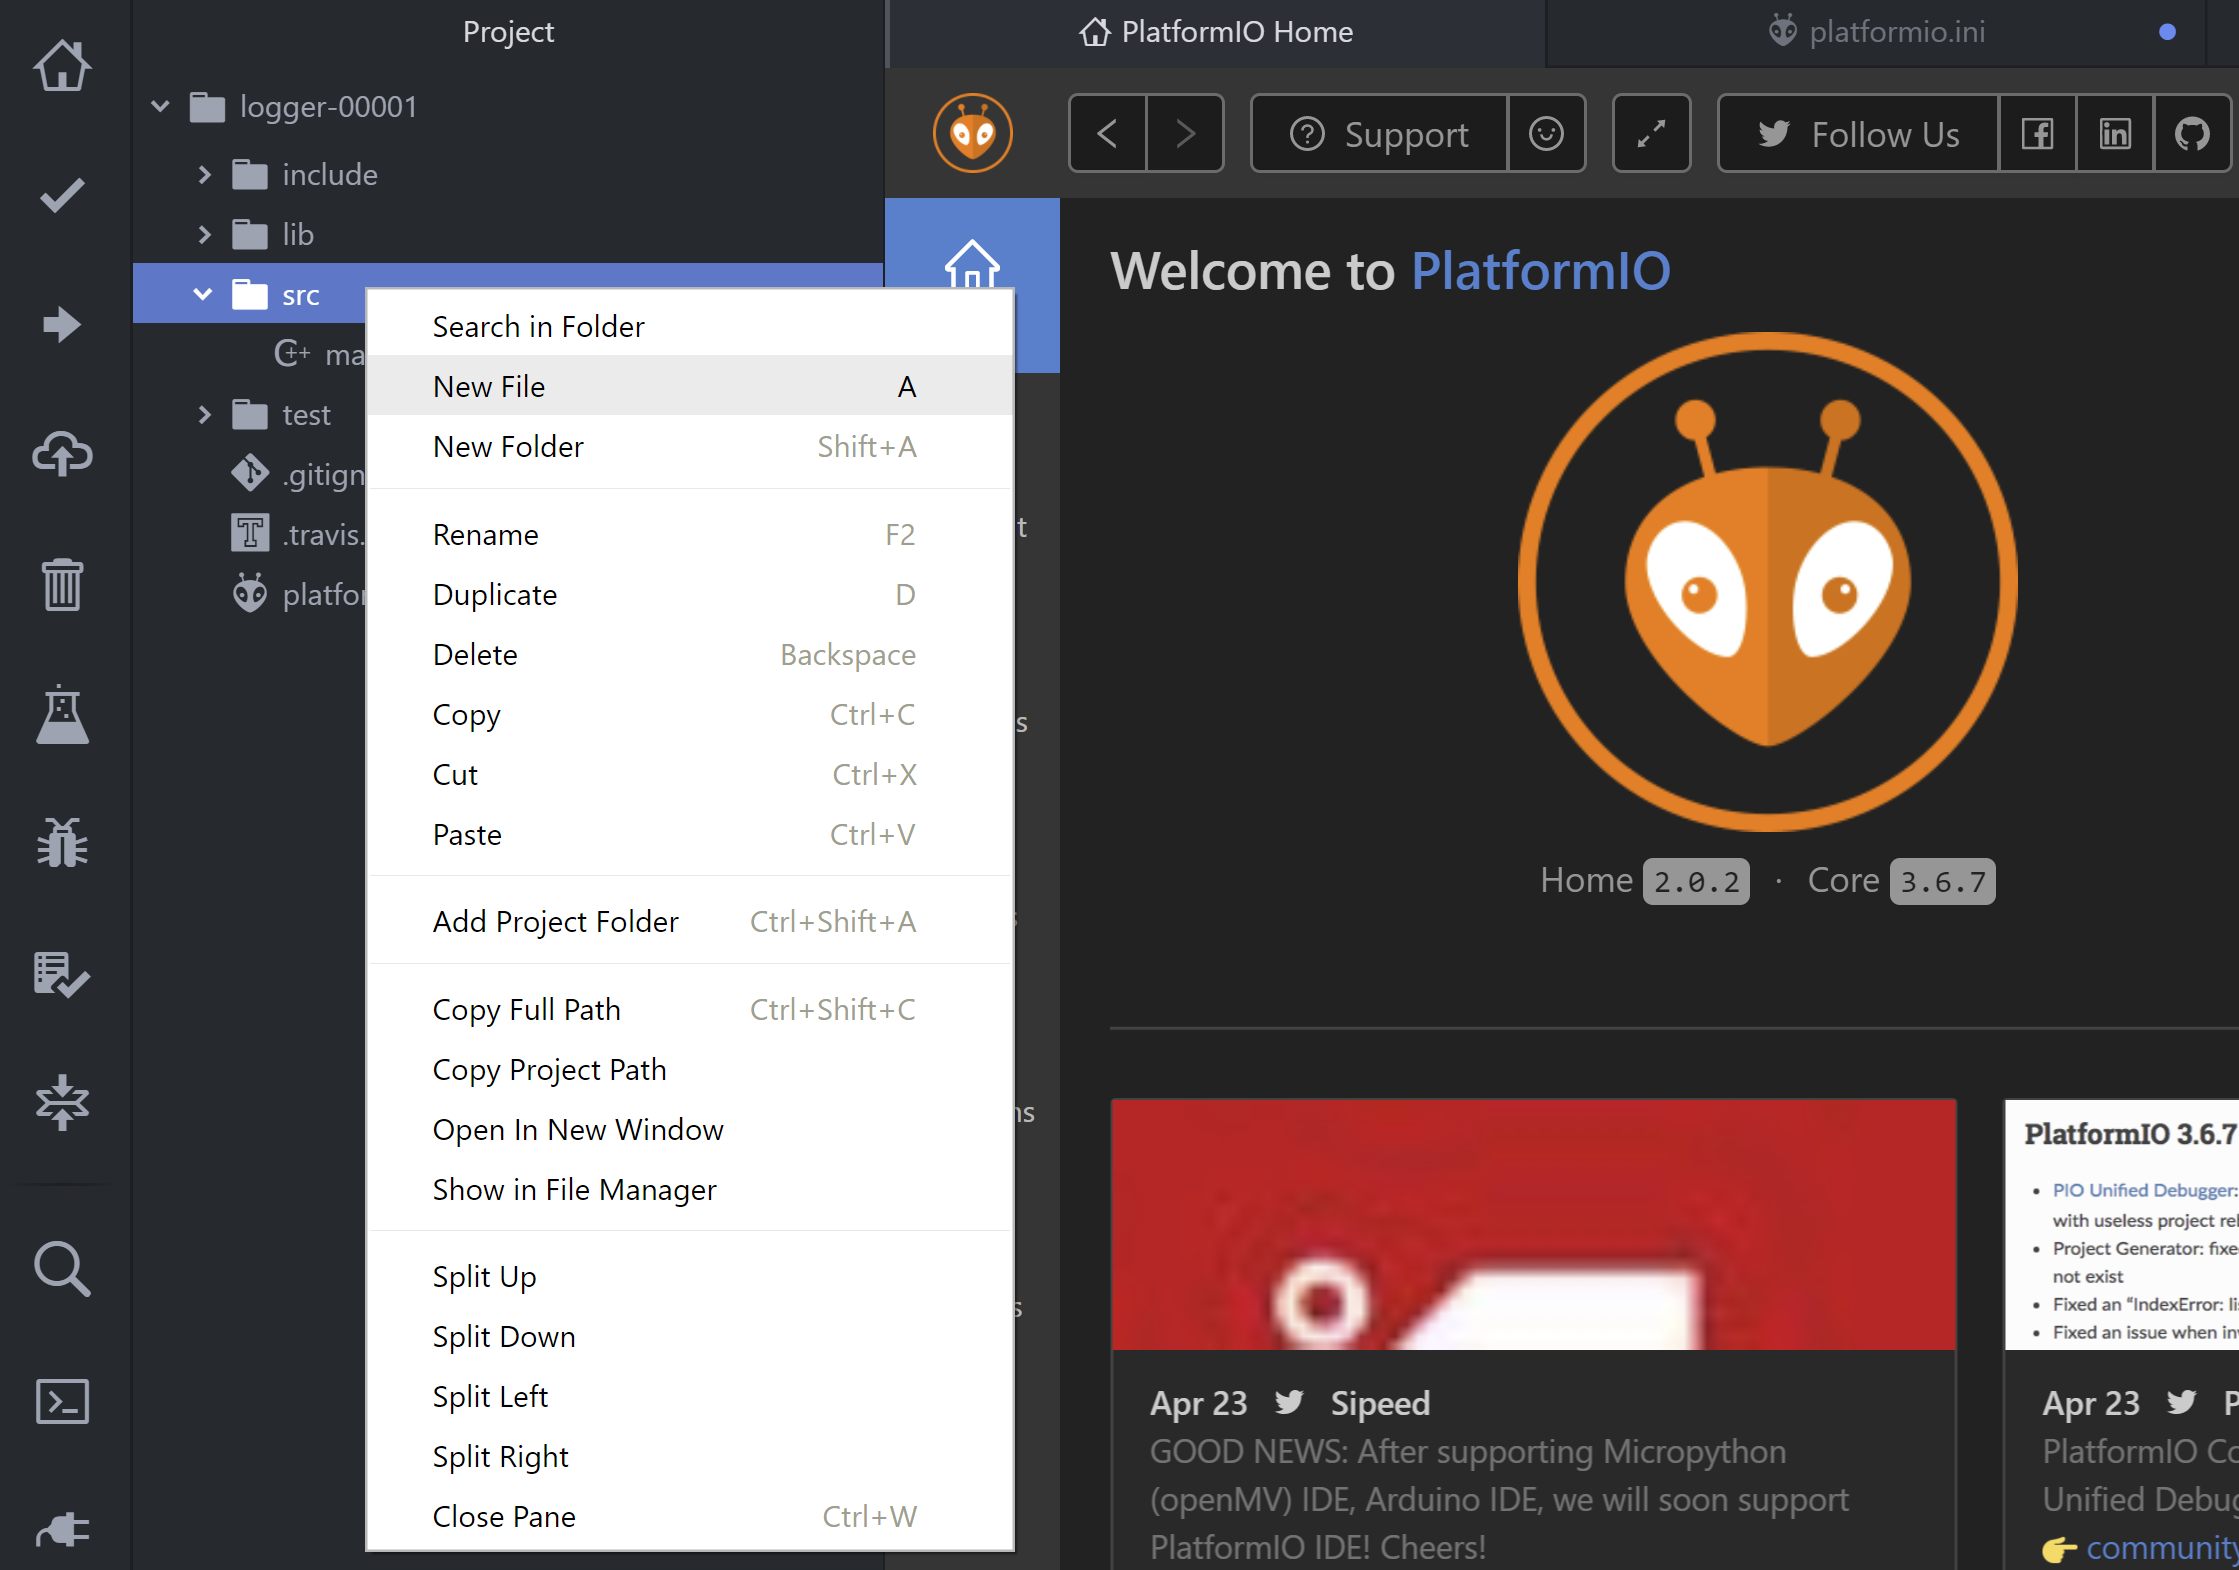
Navigate to the online GitHub repository called Stream_Gauges and go to the
logger-00001folder or any other folder - the more recent the better (Stream_Gauges/Deployment code/Logger-Code/logger-00001/)
Inside the folder, find the
logger-00001.inofile, and click once to open in the browser.Click the button on the right side of the screen labeled
Raw. Copy and paste everything within this file into the newly created.inofile in PlatformIO. Do this by pressingCtrl+A,Ctrl+Cand then navigating to the new.inofile in PlatformIO and pasting the code usingCtrl+v.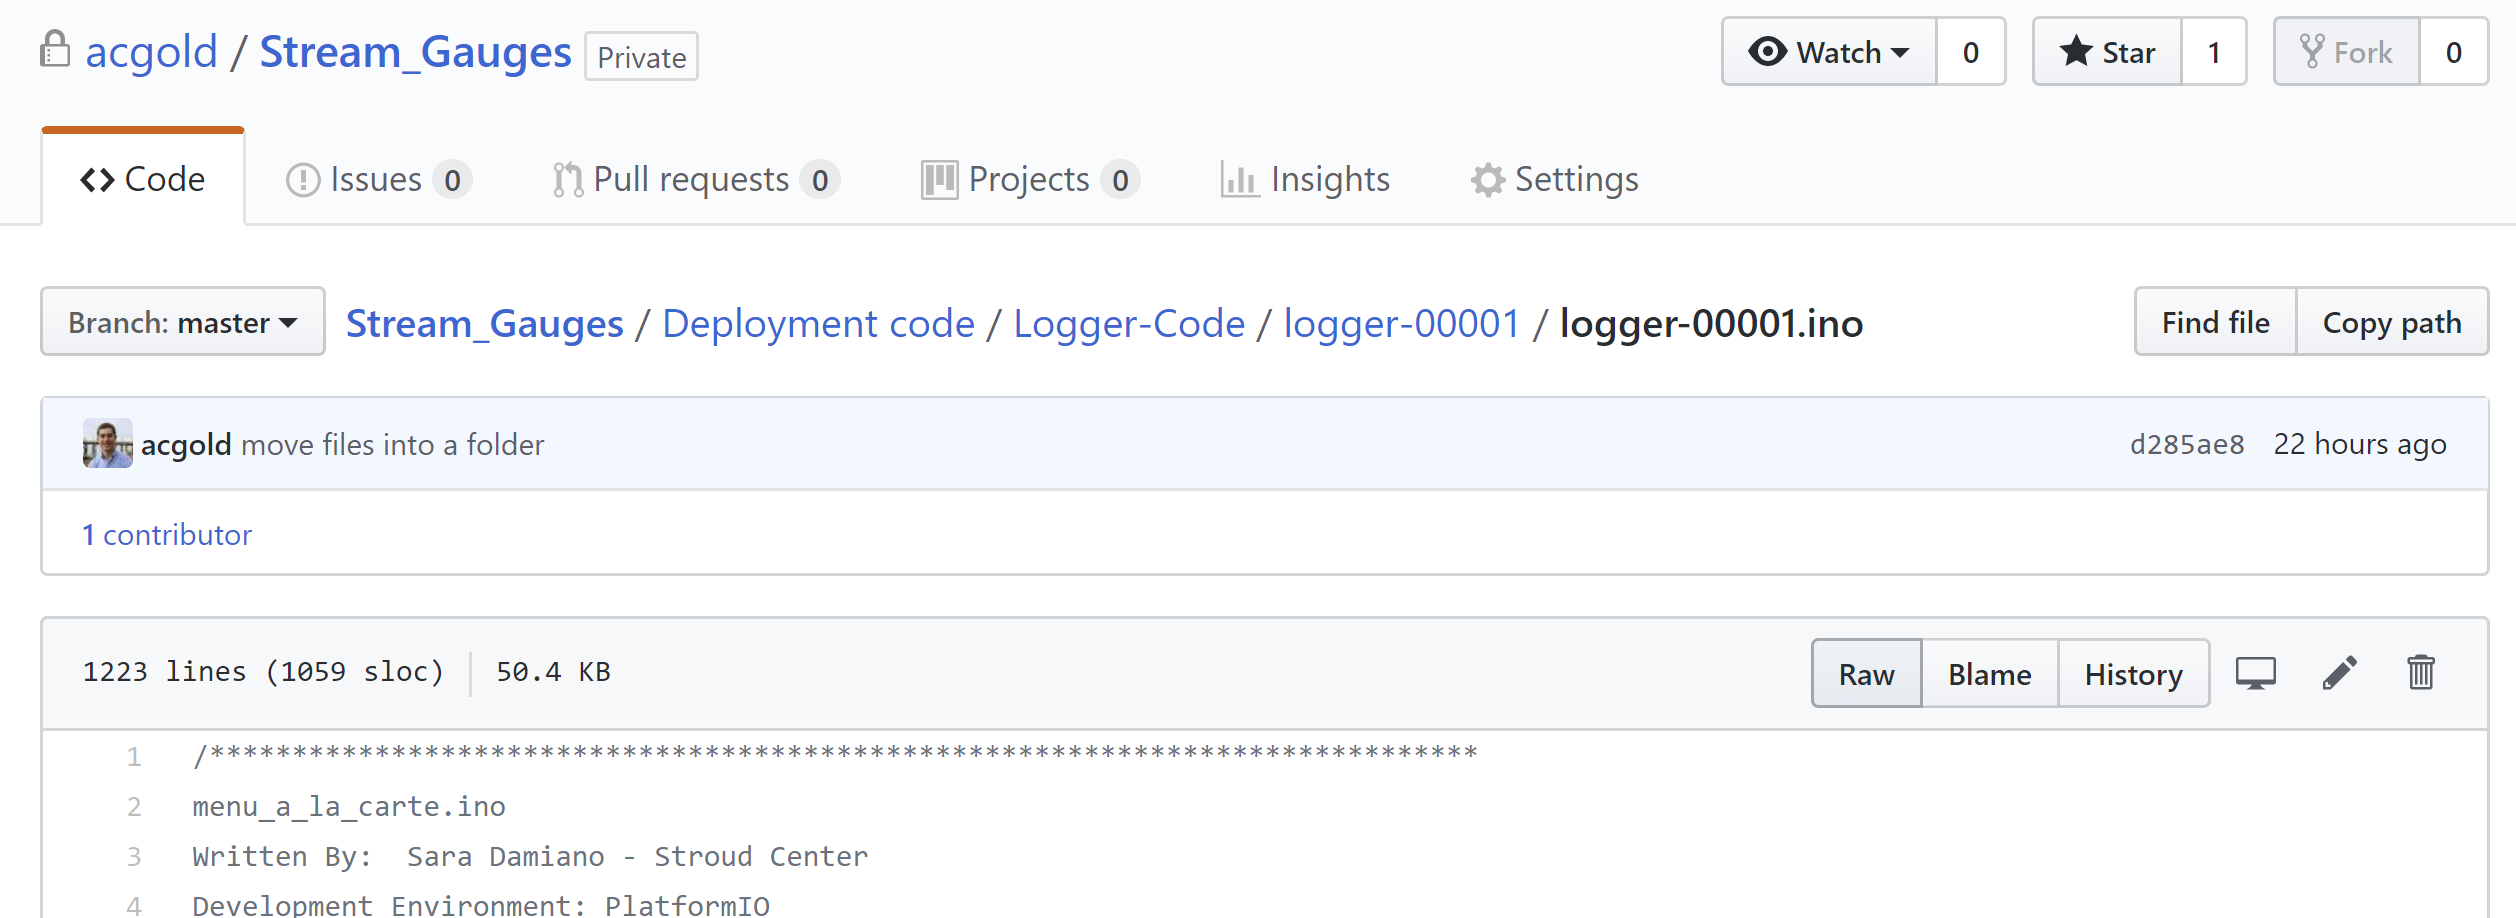
Press
Ctrl+sto save the file with the new code. Scroll down to the section labeledData Logger Settingsand change the number next toLoggerIDto specify another datalogger. Example -LoggerID = "00001". If necessary, change theloggingIntervalfrom30minutes to another # of minutes or change the timeZone (relative to UTC)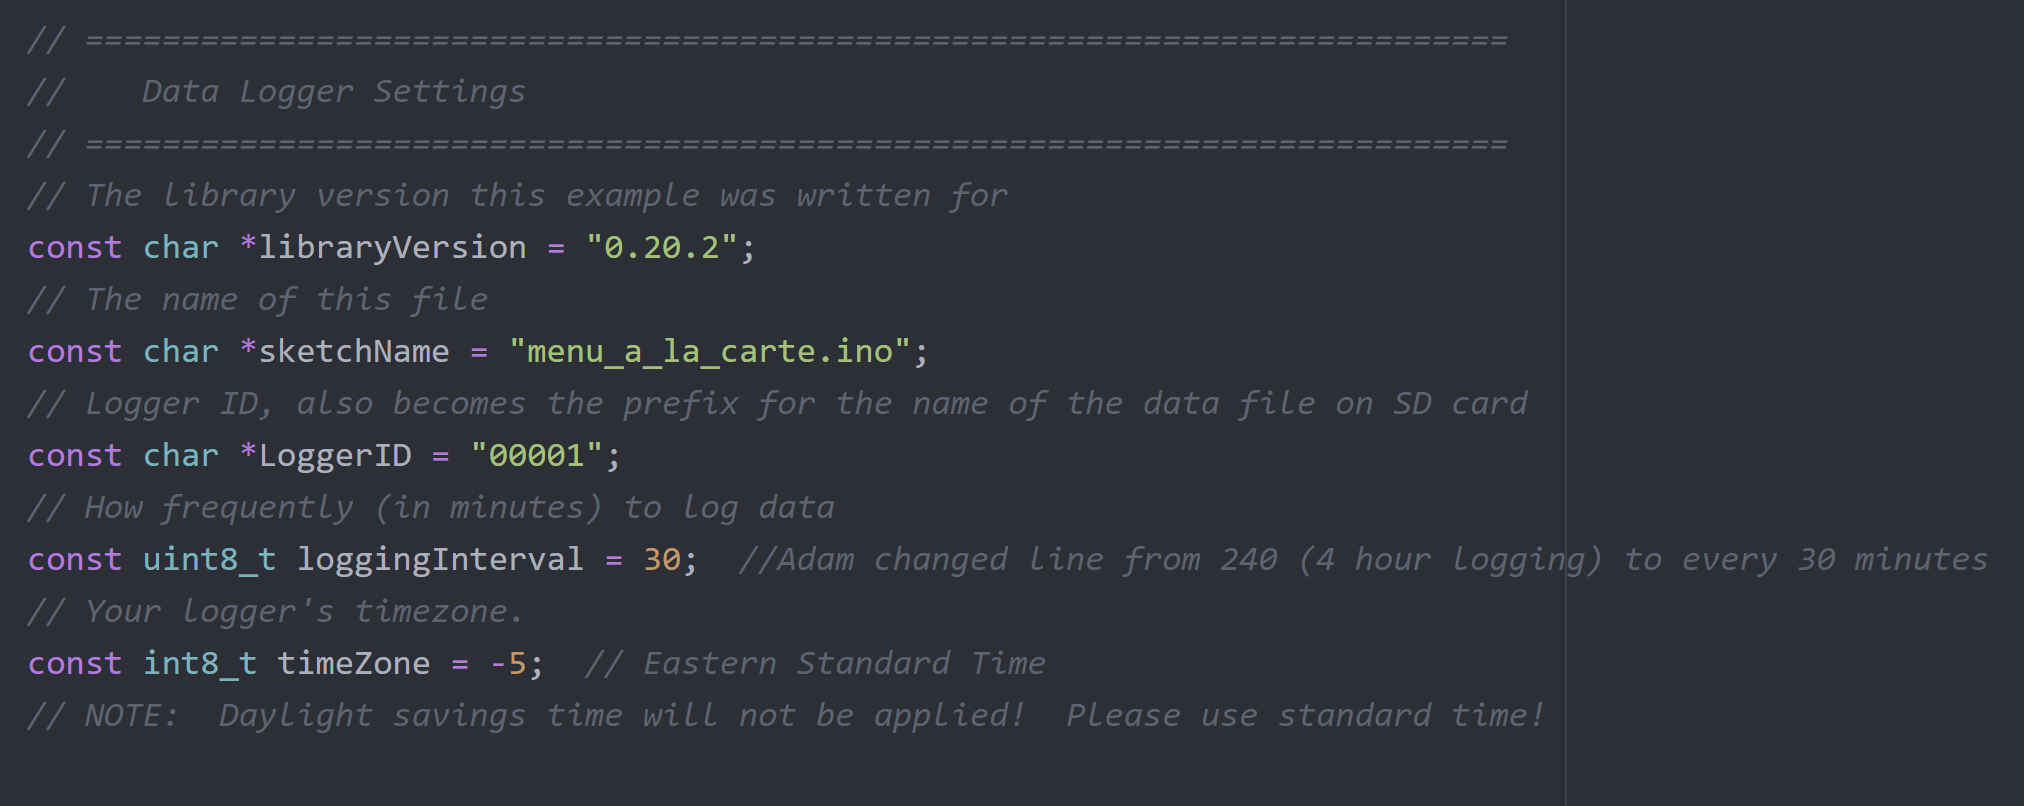
Scroll down in the code to a section called
Creating the Variable Array[s] and Filling Variable Objects. Using the UUID token list from the MMW site webpage popup (step 8 of setting up data transmission & storage, replace the sensor UUIDs in the.inofile (the super long number and letter tokens) with the sensor UUIDs from the MMW site you want to send the data to. UseCtrl+sto save.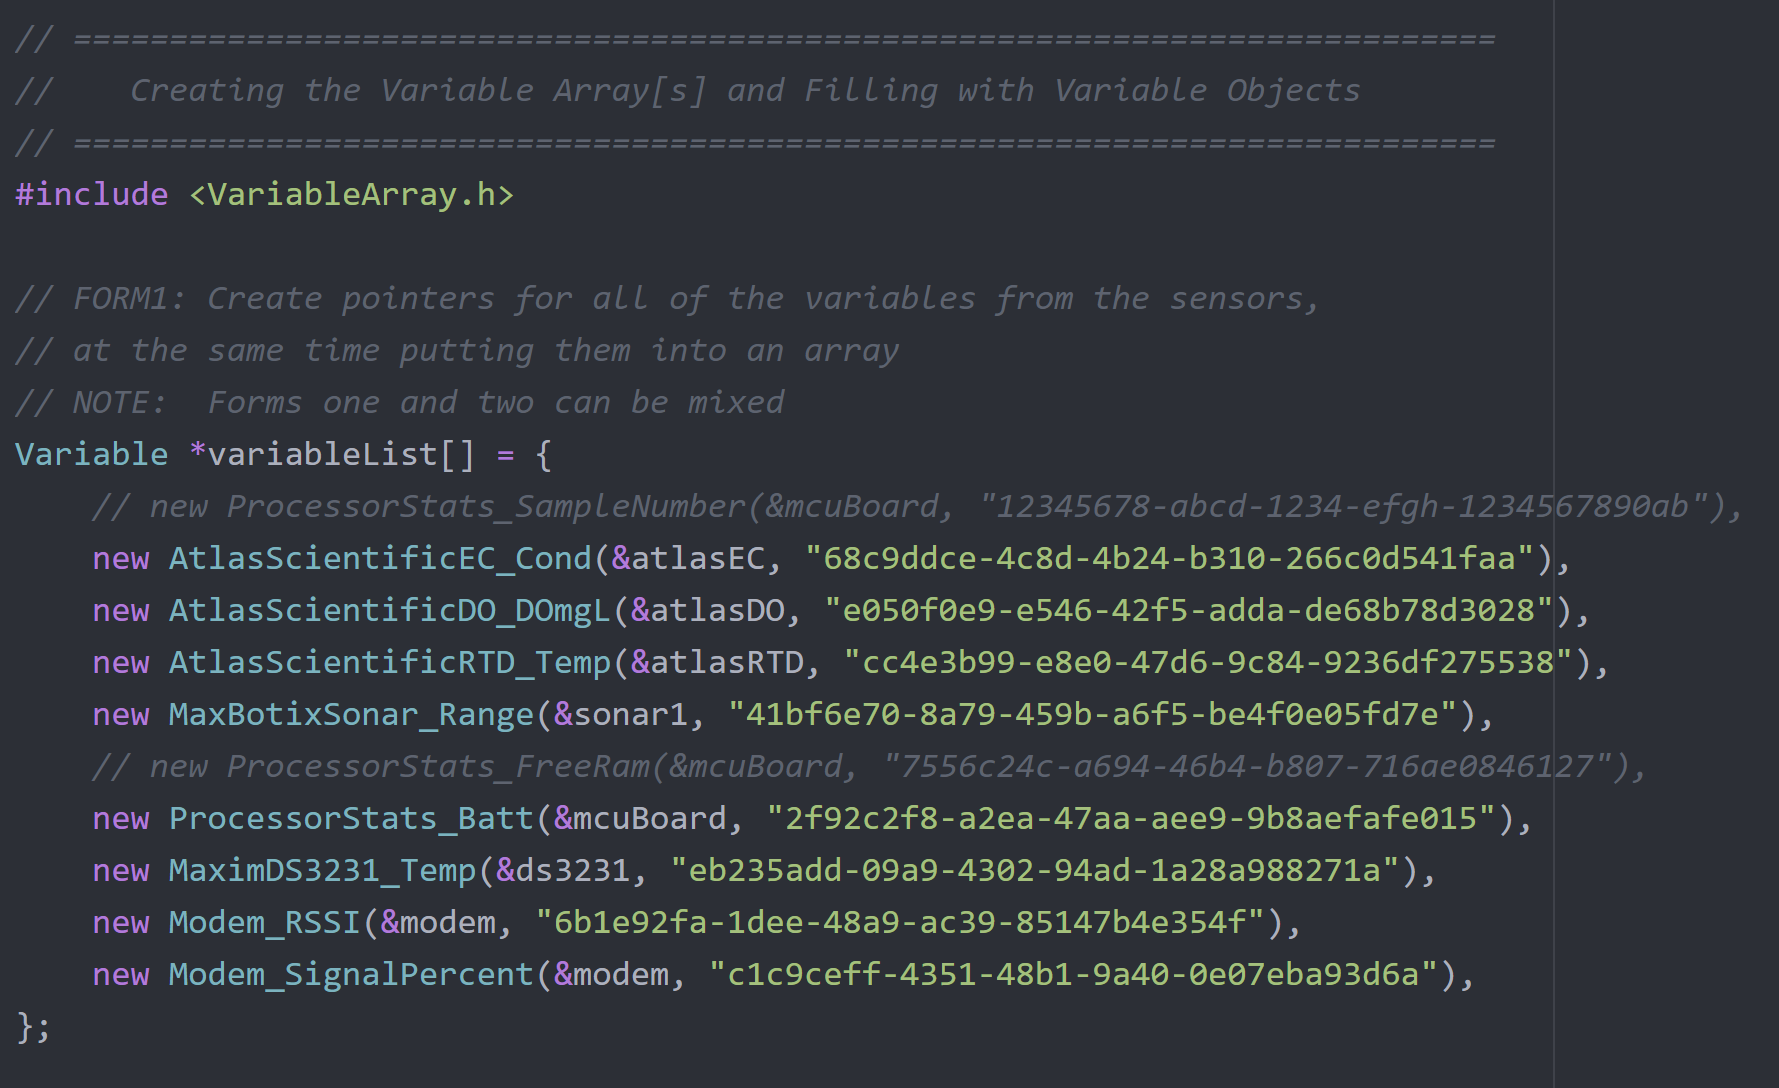
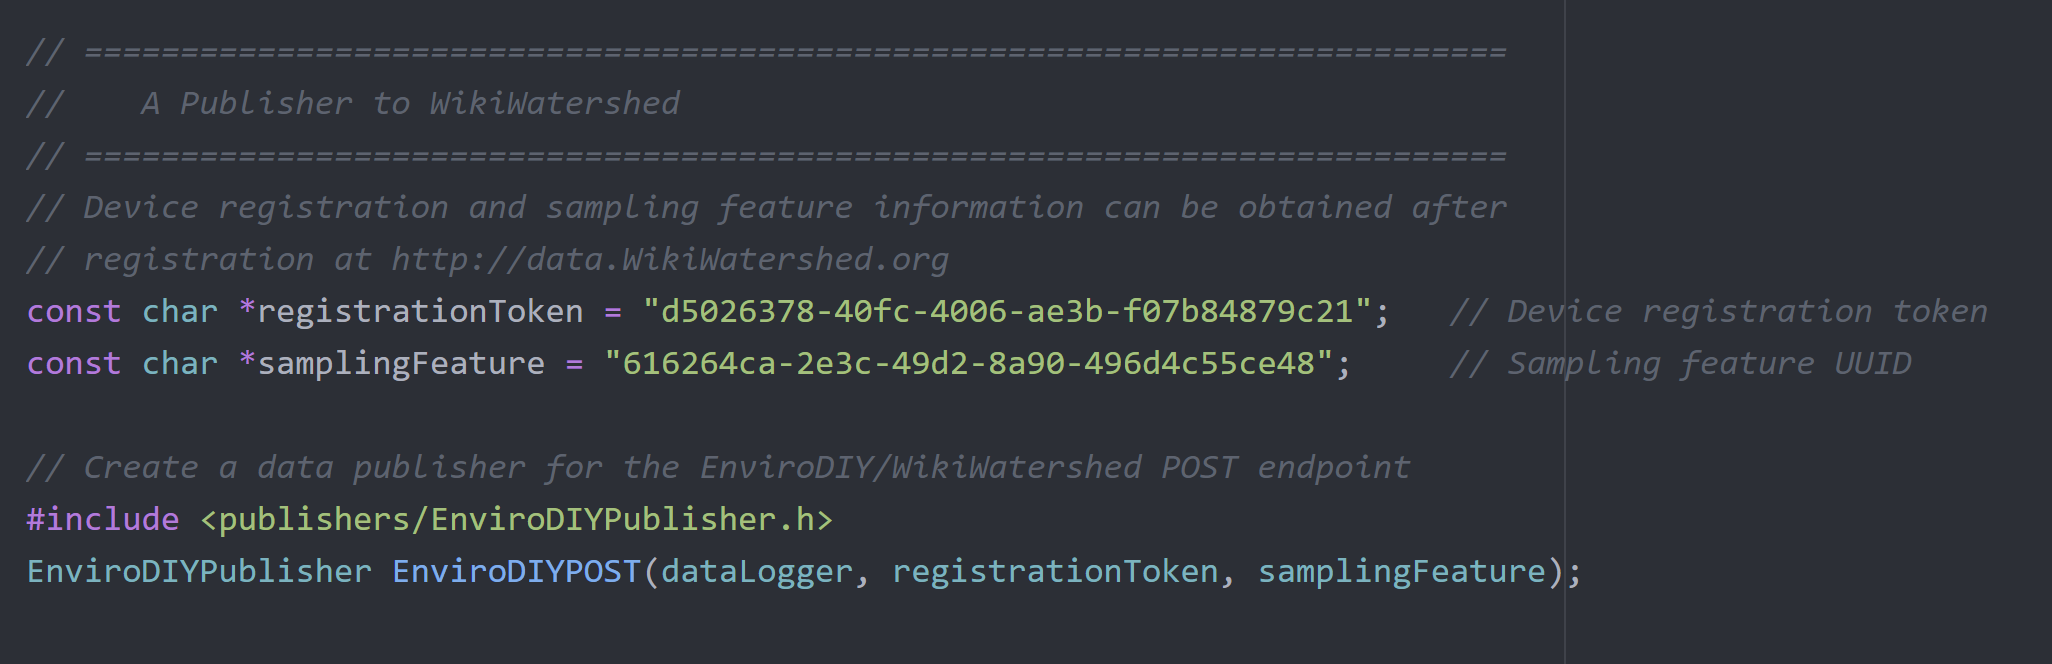
Scroll down farther to the section called
A publisher to WikiWatershed. Change theregistrationTokenandsamplingFeatureto the correct values that are also within the UUID token list from the MMW site webpage popup.
In PlatformIO, double-click on the file on the left side called
platformio.ini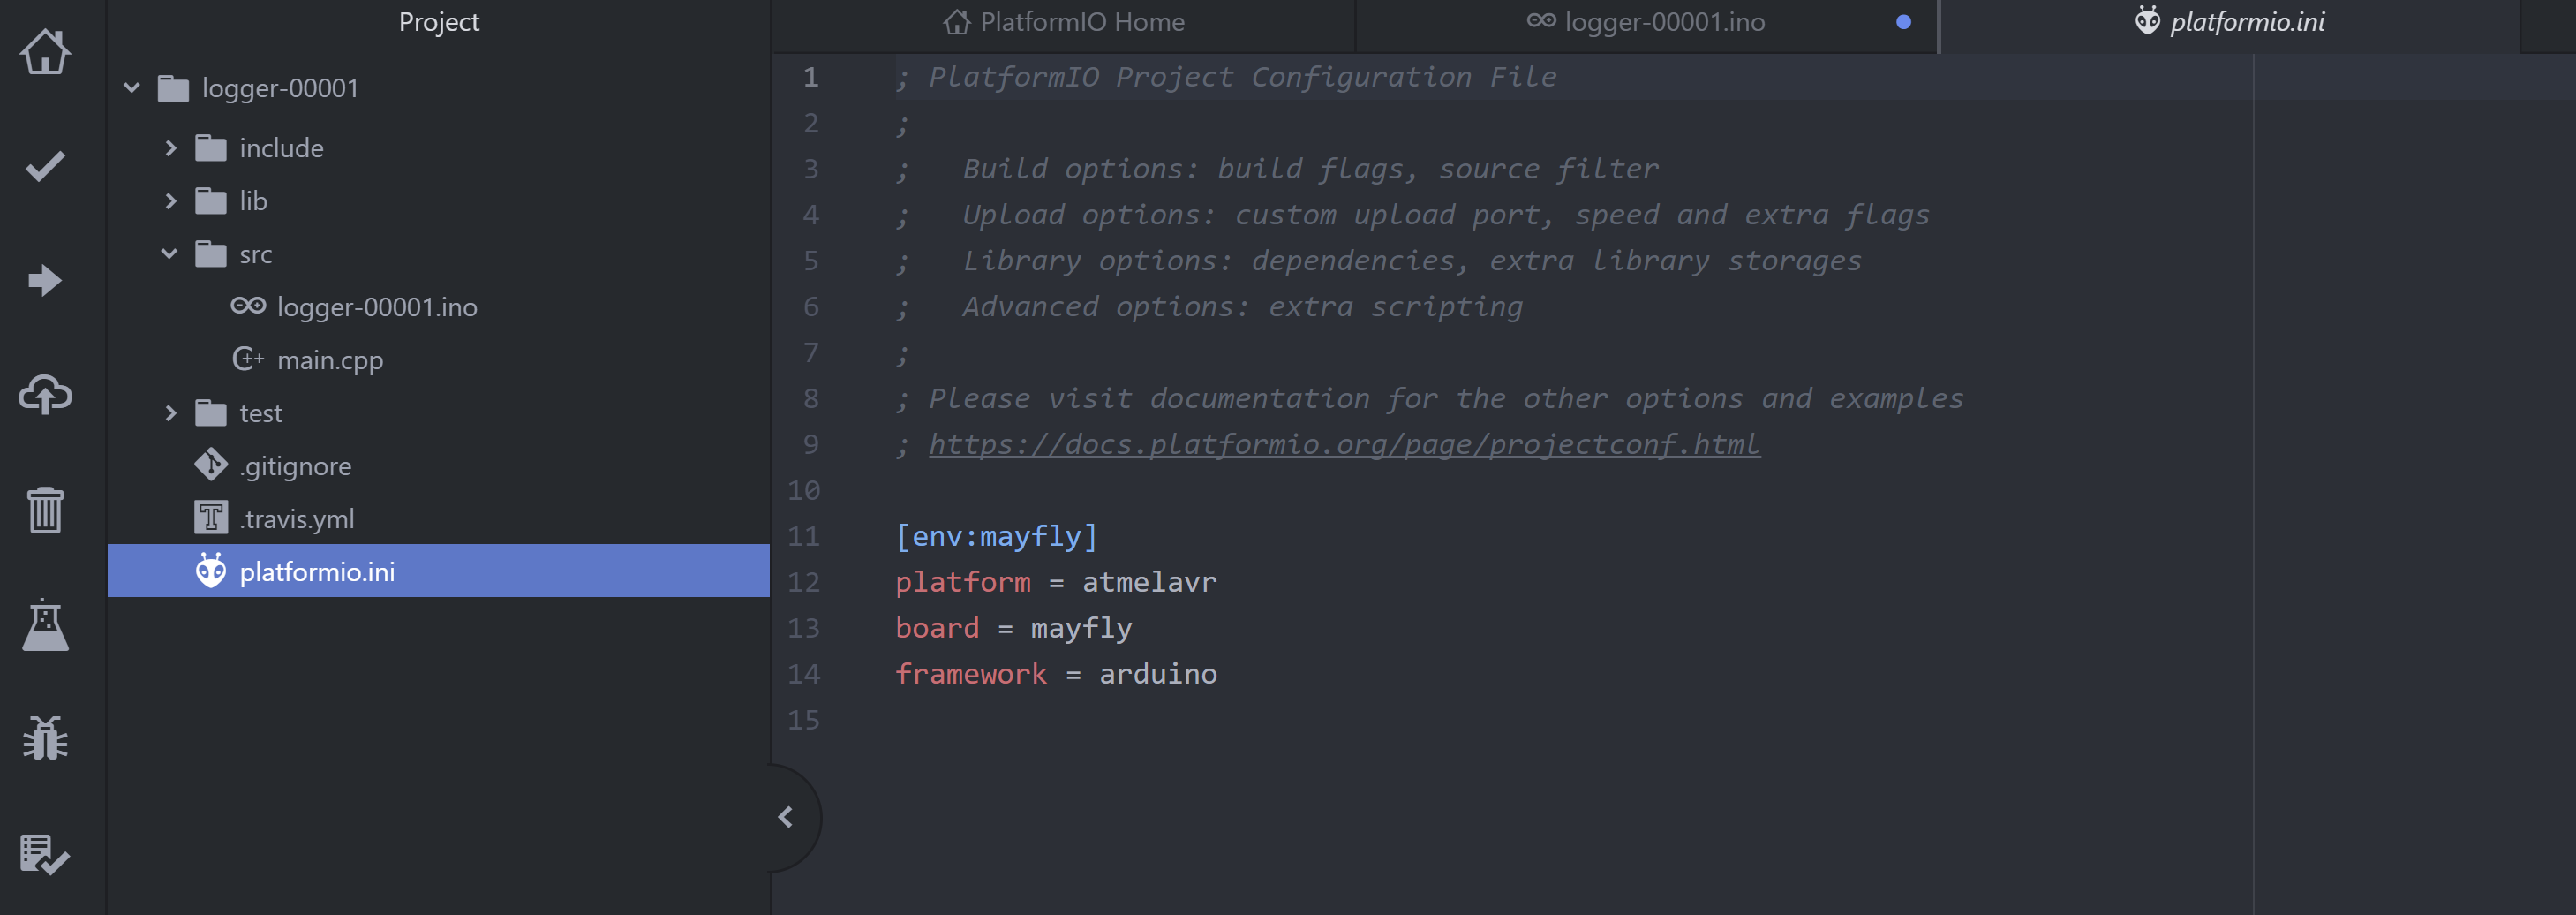
Go back to the online GitHub repo, click on the
platformio.inifile within theLogger-Codefolder. Click theRawbutton on the right side of the screen, copy & paste all of the code into the file within PlatformIO calledplatformio.inithat you just opened in the previous step. PressCtrl+sto save.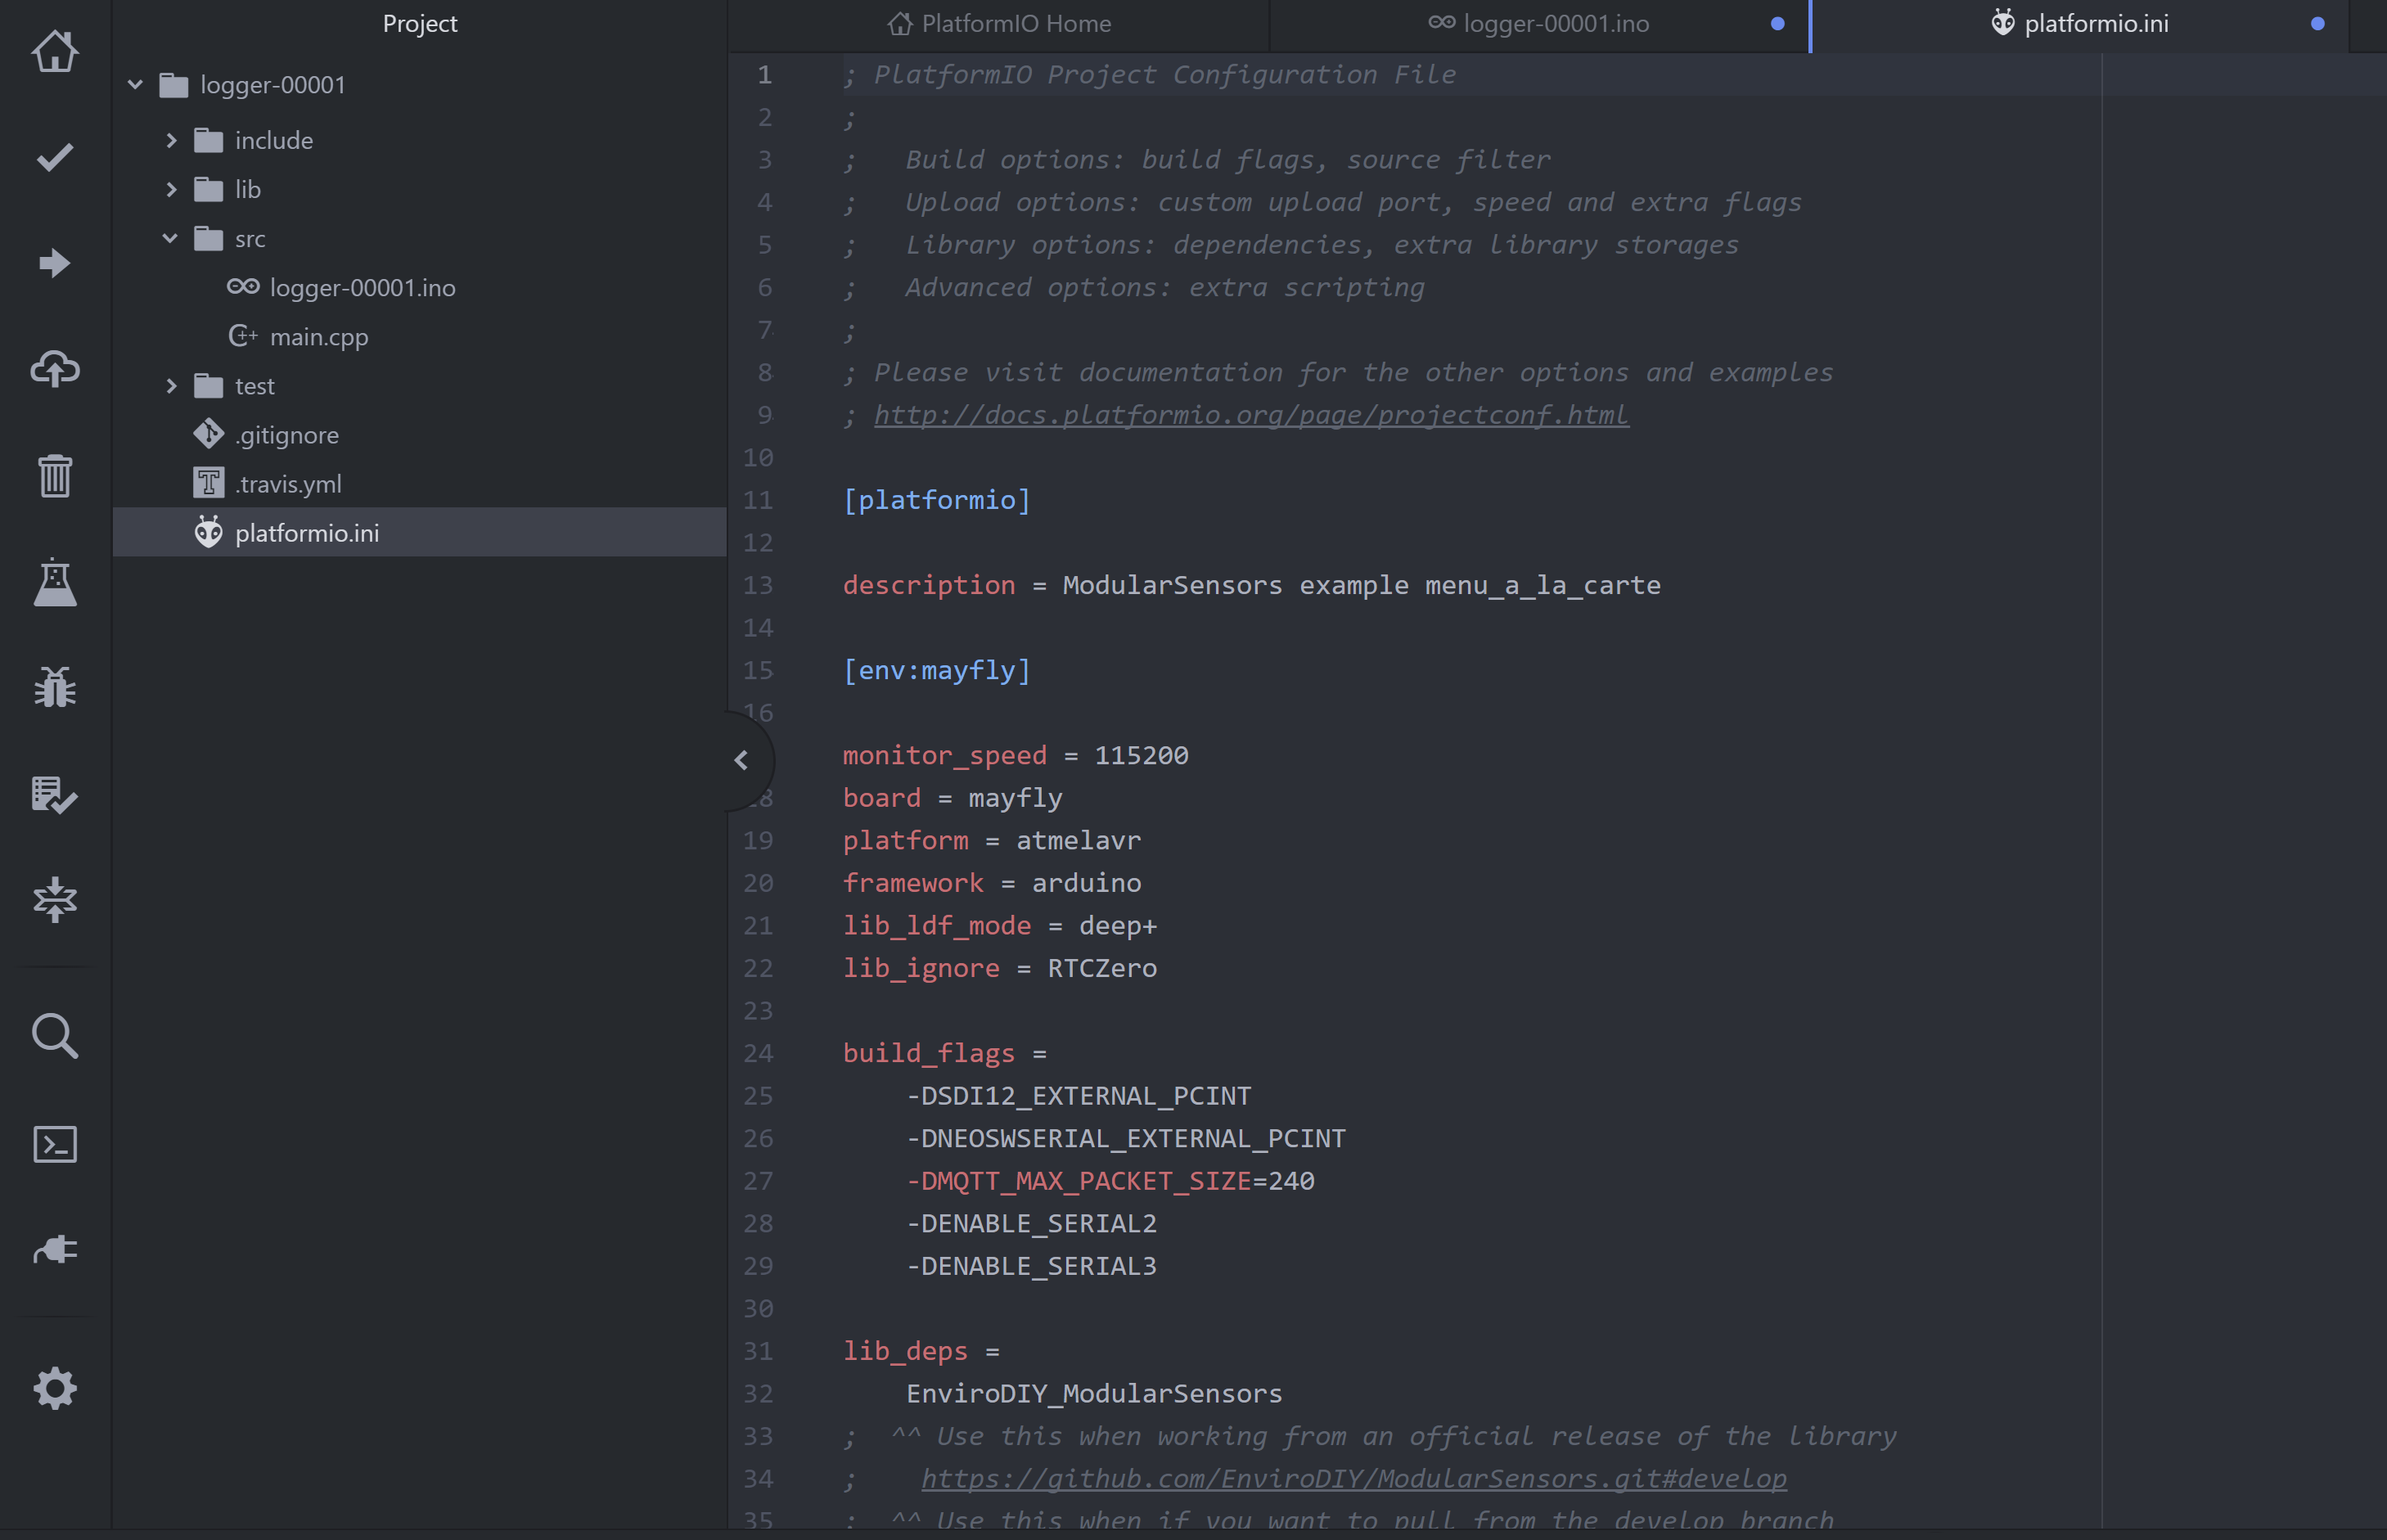
Click on the button at the bottom of PlatformIO called “terminal”. This will open a code terminal, and you should click the mouse inside it and press enter. This will bring up the full path name for whatever project you are working in. Type, or copy + paste, the following code into the terminal and press enter:
‘pio lib install EnviroDIY_ModularSensors@0.21.4’
Repeat this step twice to make sure that all package dependencies are installed appropriately.
Build the project
Save both open files - the
.inoandplatformio.inifiles.Right click the file named
main.cppwithin thesrcfolder, and delete this file. The project will not build or upload correctly without deleting themain.cppfile.Click the check mark on the left side of the screen in PlatformIO to build the project. This will download all necessary libraries and compile the code. You will see code show up at the bottom of the screen, and eventually it should say
Successin green after 60s.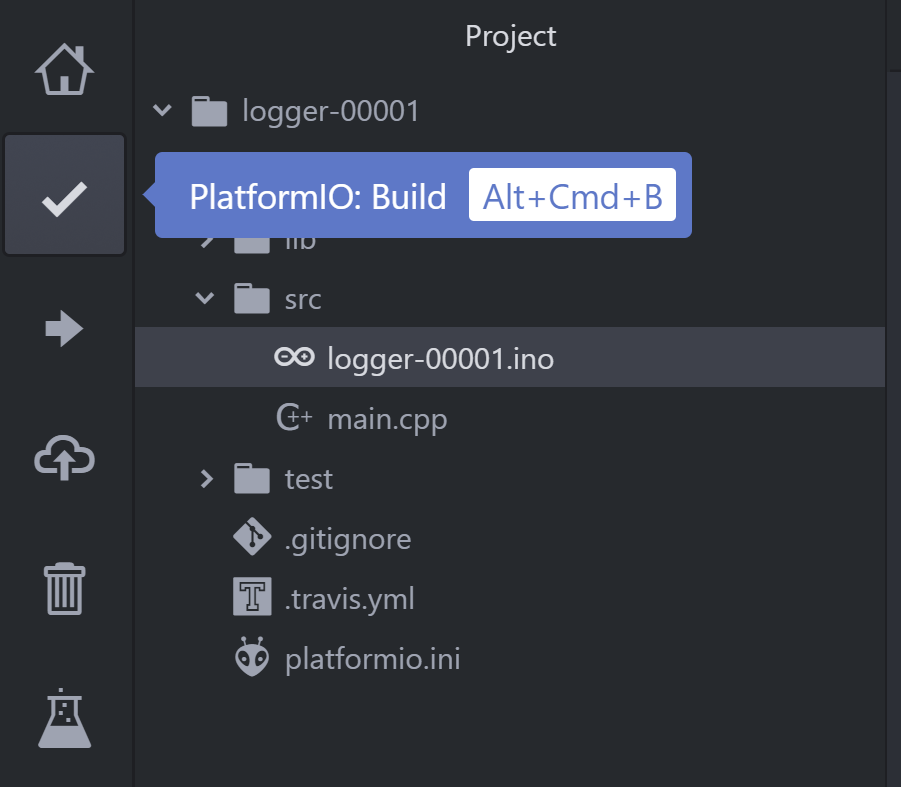
Once the project has been successfully built, attach the datalogger to the computer using a USB-MicroUSB cord, and turn on the datalogger. Click the arrow on the left side of the screen in PlatformIO (just under the check mark we used to build the project). This will upload the code to the datalogger. You will see code show up at the bottom of the screen, and eventually it should say
Successin green after a minute or two. You can turn off the datalogger because it is ready for deployment! Check the next section to learn how to view what’s happening on the datalogger after uploading this code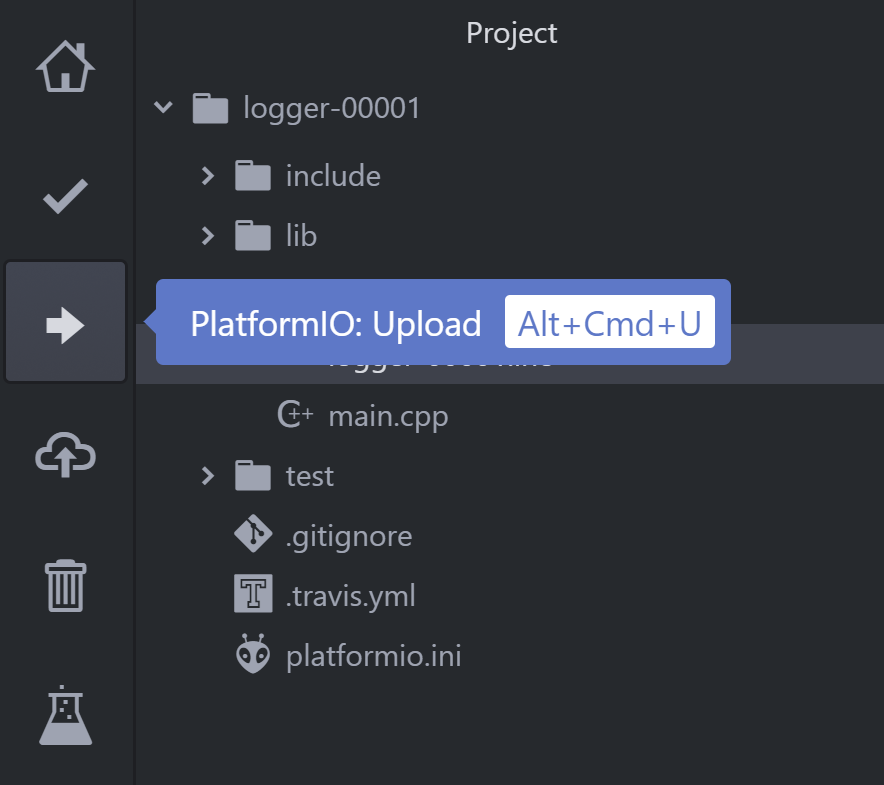
Using the Serial Monitor
Once you upload code, you sometimes want to connect to the datalogger and view what code is running (i.e., did it work?). You can do this using the serial monitor in PlatformIO.
Turn on the datalogger. If you just uploaded code and did not turn off the datalogger, you can move on to step 2.
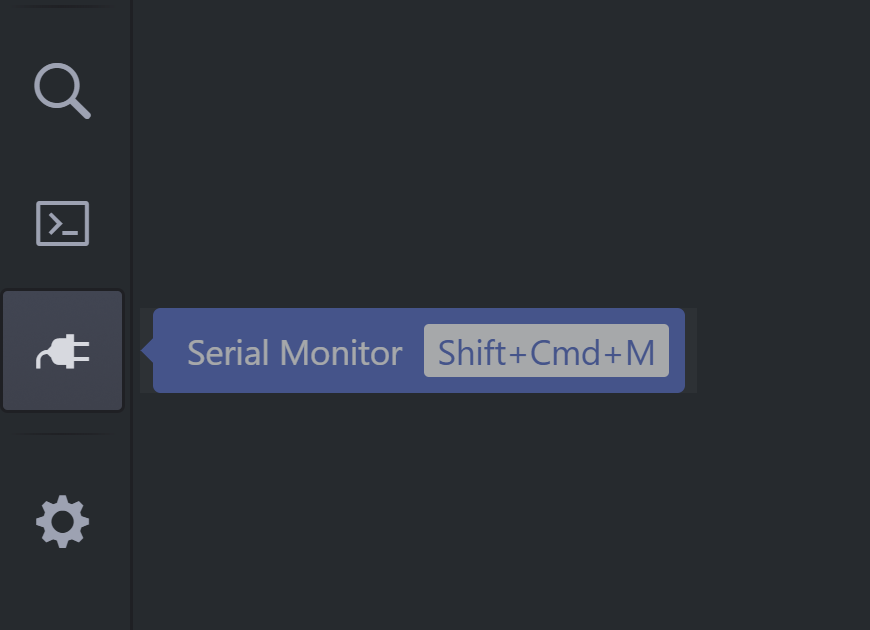
Click the plug symbol in the bottom left of the PlatformIO screen.
A window will pop up to specify the Port and the Baudrate. The Port will likely be automatically selected after a second or two, otherwise, select the correct port that the Mayfly is plugged into. Select a Baurdrate of 9600. Press
Start.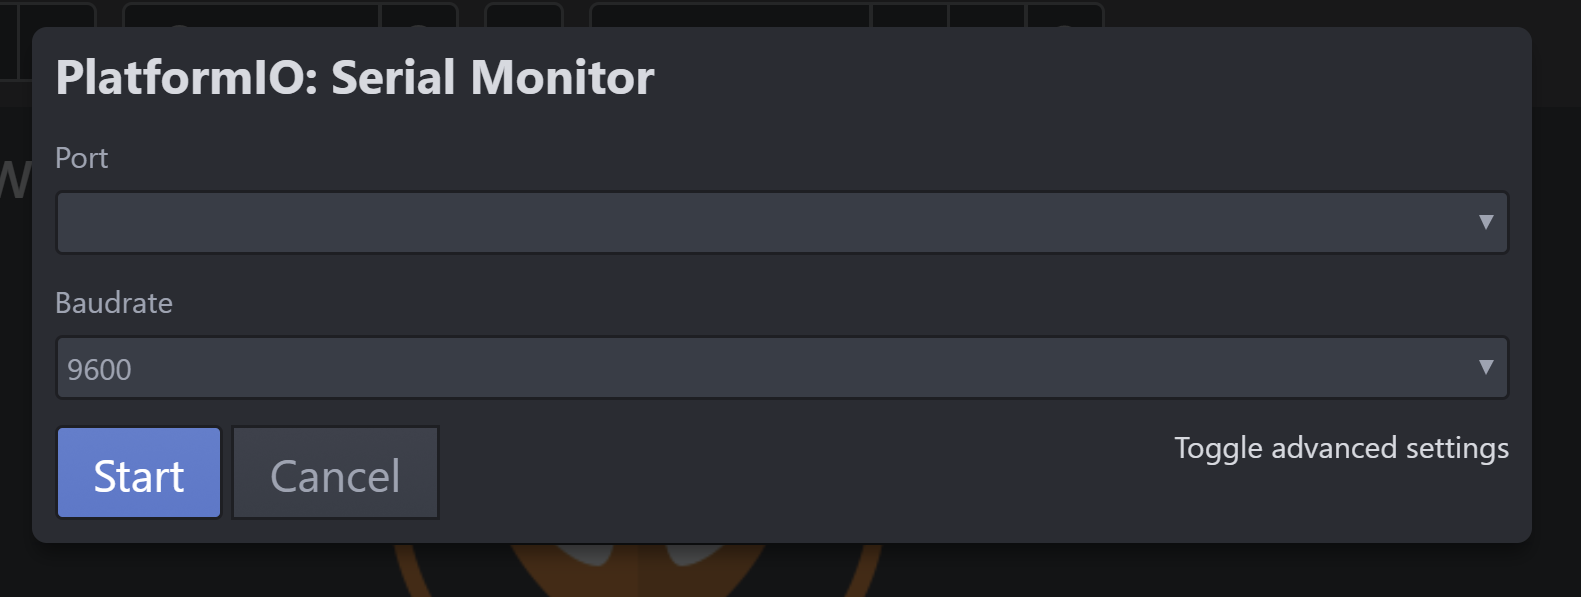
The serial monitor will open at the bottom of the screen and will show you information about the program currently running, values from the sensors every X number of minutes (specified by the logger interval in the
.inofile. Ex. 30 minute intervals will show info at 12:00, 12:30, etc.), and response codes after sending data to the MMW website (Response code 201 means success - takes about 2-3 minutes after logging interval to upload data)
Remove sensors from code (Optional)
To remove sensors from the code, scroll down to the sensor you wish to remove and place two dashes (
//) on the leftmost side of the two lines of code shown below in color.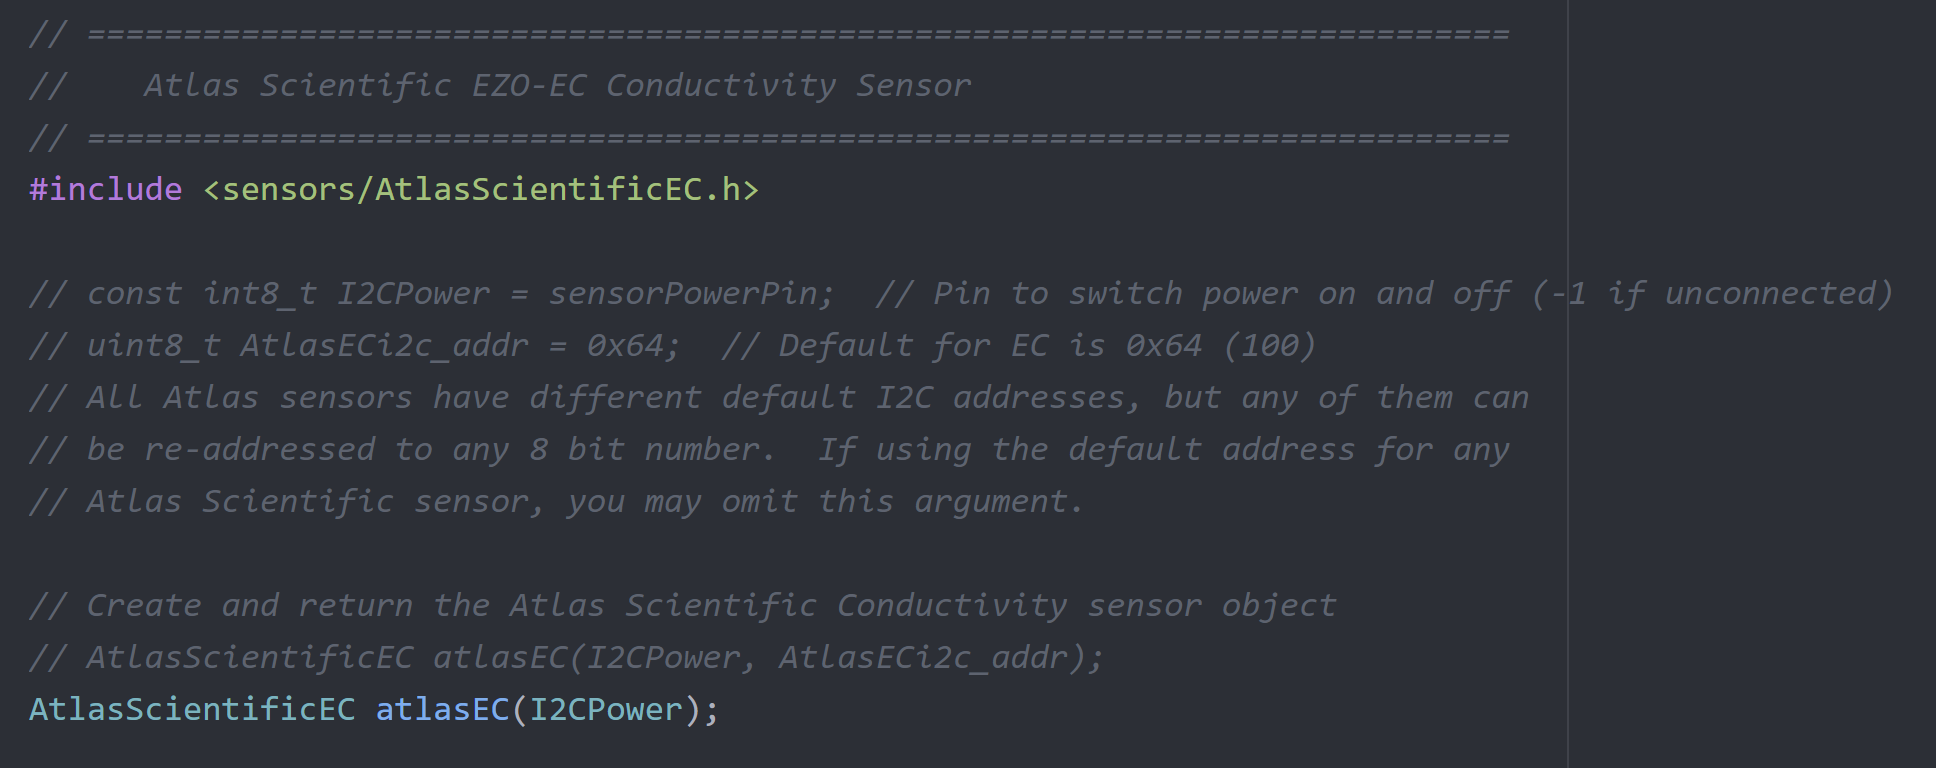
To finish removing the sensor, scoll down to the section called
Creating the Variable Array[s] and Filling with Variable Objects. Place two dashes//to the left of the line corresponding to the sensor you wish to remove. If we are removing the Atlas Scientific EC sensor, we would put two dashes (//) to the left of the linenew AtlasScientificEC_Cond(&atlasEC, ...). PressCtrl+sto save the.inofile.